
For many of us, the thought of encountering a hole in our vehicle’s fuel tank can be a daunting experience. Fuel tanks are essential components, yet they are often overlooked until a problem arises. Unlike metal fuel tanks, plastic tanks can be particularly susceptible to punctures and cracks. But fret not, with the right approach and a little patience, you can effectively fix a hole in a plastic fuel tank, restoring its integrity and ensuring safe fuel storage.

Image: cleanestor.com
Understanding the Nature of Plastic Fuel Tanks
Plastic fuel tanks are commonly used in modern vehicles due to their lightweight, corrosion resistance, and affordability. They are typically made from high-density polyethylene (HDPE) or polyamide, which provide durability and resistance to most chemicals, including fuels. However, they can be more susceptible to physical damage than metal tanks, especially when subjected to impact or external forces.
Holes in plastic fuel tanks can occur for various reasons, such as accidental punctures during maintenance or collisions with road debris. Regardless of the cause, it’s crucial to address any holes promptly to prevent fuel leakage, which could pose significant safety hazards and environmental concerns.
Step-by-Step Guide to Fixing a Hole in a Plastic Fuel Tank
1. Safety First
Before attempting any repairs, ensure your safety by parking your vehicle on a level surface and engaging the parking brake. Ensure the engine is cool and disconnect the negative terminal of your vehicle’s battery to prevent accidental sparks. Wear protective gear such as gloves and eye protection.
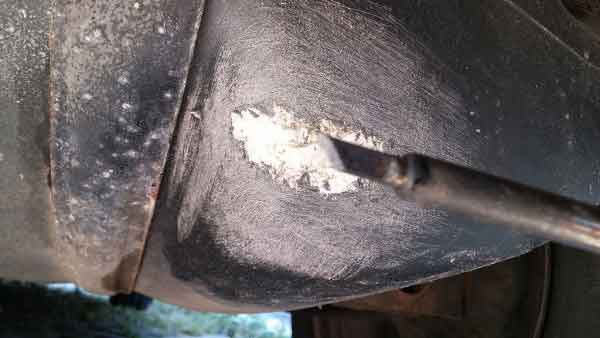
Image: carphrases.com
2. Locate and Prepare the Hole
Thoroughly clean the area around the hole using a degreaser or rubbing alcohol. This will remove any dirt or debris that could interfere with the repair. If the hole is on the bottom of the tank, you may need to elevate the vehicle to access it comfortably.
3. Choose and Prepare the Repair Material
There are two primary options for repairing a hole in a plastic fuel tank: a fuel tank repair kit or a two-part epoxy adhesive specifically designed for plastic. Fuel tank repair kits often include pre-cut patches and an adhesive, while epoxy adhesives provide more flexibility in shaping the repair.
4. Clean and Prepare the Adhesive
Thoroughly mix the two components of the epoxy adhesive, ensuring an even consistency. If using a fuel tank repair kit, follow the manufacturer’s instructions for preparing the patch and adhesive.
5. Apply the Repair
For epoxy adhesives: Apply the adhesive directly to the hole and surrounding area. Use a clean cloth or brush to spread the adhesive evenly and press the patch firmly over the hole. For fuel tank repair kits: Position the pre-cut patch over the hole and apply the adhesive as per the manufacturer’s instructions.
6. Allow for Curing or Bonding Time
Depending on the repair method, allow sufficient time for the adhesive to cure or bond. Refer to the product’s instructions for the recommended curing time.
7. Reinstall and Reconnect
Once the repair is complete, carefully reinstall the repaired fuel tank in its original position. Reconnect the battery’s negative terminal and any other components that were removed during the repair process.
8. Fuel Tank Testing
Before starting your vehicle, pour a small amount of fuel into the tank and check for any leaks around the repaired area. If no leaks are detected, you can fill up the tank and operate your vehicle as usual.
Additional Tips and Considerations
- For larger holes, consider using a plastic welder to fuse the edges of the hole together before applying the adhesive repair. This will provide additional strength and durability.
- Use caution when drilling into the plastic tank for any repairs. Excessive drilling can weaken the tank’s structural integrity.
- If the hole is located in a complex area of the fuel tank or requires extensive repairs, consult a qualified mechanic to ensure proper assessment and repairs.
- Regularly inspect your fuel tank and lines for any signs of damage or potential leaks. This will help identify and address issues early on, preventing major problems.
How To Fix A Hole In A Plastic Fuel Tank
Conclusion
Fixing a hole in a plastic fuel tank can be a straightforward task with the right approach and materials. By following the steps outlined in this guide, you can effectively repair the hole, restore the integrity of your fuel tank, and ensure the safe storage and operation of your vehicle’s fuel system. Remember to always prioritize safety and consider consulting a qualified mechanic for complex repairs or any concerns.


