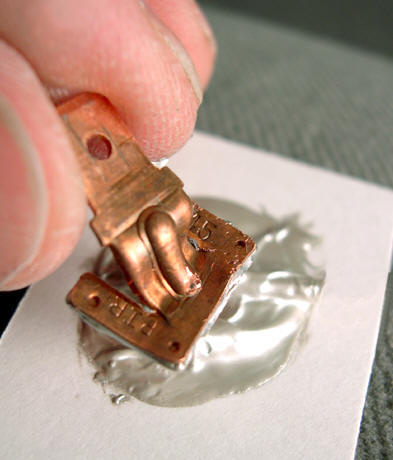
Battling with a malfunctioning rear window defroster tab? Don’t despair; help is on the way! This comprehensive guide will empower you with the knowledge to tackle this automotive issue head-on, ensuring a clear and frosty-free rearview this winter season.

Image: www.frostfighter.com
First and foremost, let’s decode what this enigmatic “rear window defroster tab” actually entails. Located along the edge of your rear window, it plays a crucial role in initiating the defrosting process. When you engage the defroster, it sends electricity through a grid of wires embedded in your rear window. This electrical current generates heat, effectively melting away snow and ice.
Troubleshooting the Culprit: Tracing the Root of the Problem
Before diving into a repair strategy, let’s pinpoint the source of your rear window defroster tab woes. Here are some common culprits to consider:
- Electrical Connection Issues: Check for loose or corroded connections at the tab terminals and along the wire harness connecting to the defroster grid.
- Tab Wear and Tear: Over time, the tab may become worn or damaged, impairing its ability to make proper contact with the defroster grid.
- Defroster Grid Failure: Less commonly, the defroster grid itself may have failed, necessitating a more extensive repair.
DIY Repair: Taking Matters into Your Own Hands
If the issue lies with the rear window defroster tab, you can often resolve it yourself with a bit of automotive know-how. Here’s a step-by-step guide to get you started:
- Safety First: Disconnect your vehicle’s battery to avoid any electrical hazards.
- Locate the Defroster Tab: Identify the tab positioned at the edge of your rear window, usually near the center.
- Inspect the Tab: Look for any visible damage or corrosion on the tab’s contact surface.
- Clean the Connections: Use a soft cloth or fine-grit sandpaper to gently clean any corrosion or debris from the tab’s contact surface and the corresponding area on the defroster grid.
- Tighten Connections: Use a wrench to ensure that the tab is securely connected to the defroster grid.
- Reattach the Battery: Reconnect the vehicle’s battery.
- Test the Defroster: Engage the rear window defroster and observe if the issue has been resolved.
When the DIY Approach Falls Short
If the DIY repair attempt proves futile, don’t fret. More complex issues, such as a failed defroster grid or extensive wiring harness damage, may require professional assistance. In such cases, consulting a qualified automotive technician is the wisest course of action.

Image: www.amazon.com
Expert Insights: Avoiding Future Mishaps
To extend the life of your rear window defroster tab and minimize future headaches, heed these tips from automotive experts:
- Regular Maintenance: Periodically inspect the defroster tab and connections for signs of wear or corrosion.
- Avoid Overload:Refrain from overloading the electrical system by using multiple high-power accessories simultaneously.
- Beware of Environmental Factors: Exposure to moisture and road salts can hasten corrosion; take precautions during inclement weather.
How To Fix Rear Window Defroster Tab
Conclusion: Crystal Clear Rearview Ahead
By following the steps outlined in this comprehensive guide, you’ll have the knowledge and tools to tackle a malfunctioning rear window defroster tab with confidence. Remember, a clear rearview is not just a matter of convenience; it’s also a crucial safety feature. So, don’t let a faulty defroster tab compromise your ability to see clearly and navigate safely during icy conditions.
If you encounter any difficulties or have additional questions, don’t hesitate to consult a qualified automotive technician. Together, we can ensure a frosty-free rearview and peace of mind on your winter journeys.


